
Azure DevOps handles user acceptance testing reliably when you combine three components: Azure Test Plans for structured test management, Microsoft Test Runner for executing and capturing diagnostics, and the Test & Feedback extension for stakeholder-friendly exploratory sessions. The result is auditable UAT with full traceability from requirement to sign-off.
Before your first UAT run, confirm you have each of these in place:
- Project access: every tester added as a project member (Stakeholder or Basic)
- Licensing: test authors and executors assigned “Basic + Test Plans”
- UAT test plan: named, scoped, and linked to a release or sprint
- Test environment: a stable UAT or staging deployment with a known build number
- Assigned testers: individual users (not AD groups) mapped to test cases
- Diagnostics enabled: Test Runner or Test & Feedback extension active
- Bug triage flow: daily triage meeting, severity definitions, and a deduplication step
- Acceptance criteria and sign-off: documented pass thresholds and named approvers
For non-technical stakeholders who won’t log into Azure DevOps, Wezardapp fills the gap: it records the screen, transcribes the issue in real time, and pushes a clean work item directly into your Azure DevOps backlog.
Key Takeaways
Running UAT in Azure DevOps requires the right licenses, a separate test plan, structured diagnostics, and a clear triage process — with a low-friction capture layer for non-technical stakeholders.
| Point | Details |
|---|---|
| Licensing is the first blocker | Test authors and executors need “Basic + Test Plans”; Stakeholder access alone cannot run Test Runner. |
| Keep UAT plans separate | Never reuse QA test plans for UAT; separate plans preserve a clean baseline for customer sign-off. |
| Diagnostics reduce triage time | Test Runner and the Test & Feedback extension auto-capture screenshots, action logs, and system info with every bug. |
| Duplicate bugs are a real overhead | Azure Boards has no built-in duplicate detection; add a deduplication step at daily triage or use Wezardapp’s AI layer before backlog creation. |
| Wezardapp bridges the adoption gap | For external or non-technical testers, Wezardapp records the screen, transcribes the issue, and syncs a clean work item into Azure DevOps automatically. |
Table of Contents
- What does Azure DevOps UAT require before you start?
- How do you create a UAT test plan and test cases in Azure Test Plans?
- How do you assign and invite stakeholder testers in Azure DevOps?
- How do you run UAT tests with Microsoft Test Runner?
- How do you capture diagnostics and file bugs during UAT?
- How do you track UAT progress with dashboards and charts?
- How do you link UAT tests to requirements and builds for auditability?
- UAT best-practices checklist for Azure DevOps
- What do you do when stakeholders won’t use Azure DevOps?
- Three steps to run your first UAT cycle this week
- Why most UAT problems are process problems, not tool problems
- Wezardapp reduces UAT adoption friction and maps feedback into Azure DevOps
- Sources
What does Azure DevOps UAT require before you start?
Getting the prerequisites wrong is the fastest way to stall a UAT cycle. A tester who can’t log in, a build that isn’t deployed, or a missing license blocks the whole session.
Access levels and permissions
Azure DevOps has three access levels that matter for UAT:
| Role | Access Level | Can Do |
|---|---|---|
| Test case author | Basic + Test Plans | Create/edit test plans, suites, cases |
| Test executor | Basic + Test Plans | Run tests, file bugs, capture diagnostics |
| Business stakeholder | Stakeholder | View work items, add comments, update fields |
| External reviewer | Stakeholder (or none) | Cannot run Test Runner without a license |
Stakeholder access lets business users view and comment on work items, but it does not grant the ability to execute tests in Test Runner. Azure Test Plans requires “Basic + Test Plans” licensing for anyone authoring or executing tests, which is the most common friction point when inviting external users to UAT.
Permissions to check before kickoff:
- Edit work items in the project area path
- Create tags (needed for UAT labeling and triage filters)
- View test runs for stakeholders reviewing results
- SMTP configured (on-premises Azure DevOps Server only) if you plan to send email notifications from the platform
For enterprise teams, connect your Azure DevOps organization to Microsoft Entra ID for SSO. This simplifies onboarding for internal testers and keeps access revocation clean when UAT ends.
Pro Tip: Create a dedicated UAT security group in your project. Add all testers to that group, assign the group to the UAT area path, and revoke access in one step after sign-off rather than hunting down individual accounts.
Environment and test data
Your UAT environment should mirror production as closely as possible: same OS, same browser versions, same data volume. Agree on a specific build number before the session starts so every bug filed is tied to a known release candidate. Sanitize any production data used for testing — personally identifiable information in test environments is a compliance risk even when the environment is internal.
How do you create a UAT test plan and test cases in Azure Test Plans?
Azure Test Plans stores test artifacts in your project and links them to Boards, Pipelines, and Repos, so every test result traces back to a requirement and a build. The hands-on lab exercises from Microsoft mirror the exact UI steps below.
Step-by-step: building your UAT test plan
- Go to Test Plans in your Azure DevOps project and select + New Test Plan.
- Name it with a UAT-specific convention:
UAT - Release 3.2orUAT - Customer Acceptance - Q3. Avoid reusing QA plan names; keeping plans separate preserves your internal QA baseline and gives customers a clean sign-off record. - Set the Area Path to the team or product area under test and choose the Iteration that matches the release sprint.
- Inside the plan, create your first Test Suite. For UAT, requirement-based suites work best: they link directly to user stories or product backlog items, so every test case inherits the requirement’s acceptance criteria.
- Add static suites for cross-cutting scenarios (smoke tests, regression checks) that don’t map to a single story.
- Use query-based suites when you want the suite to auto-populate with test cases matching a work item query, such as all stories tagged
UAT-Ready.
Authoring test cases from acceptance criteria
Each test case should map to one acceptance criterion. Required fields:
- Title: written as a user action (“User submits order with invalid payment method”)
- Steps: numbered, with an Expected Result for each step
- Attachments: screenshots of expected UI state or linked specification docs
- Configurations: assign browser/OS combinations so each test point is reproducible
Parameterized steps let you run the same case with multiple data sets (different user roles, different input values) without duplicating the test case.
Pro Tip: Keep UAT test cases to 5–8 steps maximum. If the reproduction path is longer, attach a walkthrough document rather than embedding every click in the step list. Non-technical testers lose confidence when they see 20-step cases.
How do you assign and invite stakeholder testers in Azure DevOps?
Azure Test Plans supports assigning multiple testers to a plan, including business stakeholders, and tracking their progress through chart views.
Native assignment flows
In the Execute tab of your test plan:
- Select all tests in a suite and use Assign testers to run all tests to bulk-assign a single tester or rotate through a list.
- For individual test cases, use the Assign tester dropdown on each test point.
- Search by name or email to find users already added to the project.
One hard limitation: you cannot assign an Active Directory group to a test. You must add individual users. If your UAT involves 20 business testers, add them one by one or use a script against the Azure DevOps REST API.
Notification options
Azure DevOps sends email notifications when tests are assigned, but on-premises Azure DevOps Server requires SMTP to be configured first. For cloud-hosted Azure DevOps Services, notifications work out of the box. Send testers a calendar invite alongside the Azure DevOps notification — the platform email alone rarely drives action.
Invitation template for non-technical testers
Subject: UAT Session — [Product Name] Release [X.X]
Hi [Name],
You’ve been assigned [N] test cases for our upcoming UAT session on [Date] from [Time] to [Time].
What you’ll do: Follow the steps in each test case and mark each step Pass or Fail. If something looks wrong, click “Create bug” — the tool captures your screen automatically.
Login: [Azure DevOps URL] — use your [company email] credentials.
Questions? Reply to this email or join the Teams channel: [link].
Thank you for helping us ship a quality release.
Pro Tip: For testers who find Azure DevOps intimidating, run a 15-minute orientation call before the session. Walk through one test case together. Testers who’ve seen the UI once complete sessions three times faster than those going in cold.
How do you run UAT tests with Microsoft Test Runner?
Microsoft Test Runner runs manual tests in a browser, captures screenshots and action logs, and provides a “Run with options” dialog to select a specific build or configuration.
Running a UAT session step by step
- Open Test Plans, select your UAT plan, and navigate to the Execute tab.
- Check the test cases you want to run and click Run (or Run with options to specify a build).
- In Run with options, select the build number deployed to your UAT environment and choose the configuration (browser, OS). This ties every result to a specific release candidate.
- Test Runner opens in a side panel. Work through each step, marking it Pass or Fail.
- For a failed step, click Create bug — Test Runner pre-populates the bug with repro steps, system info, and a screenshot.
- When all steps are complete, click Save and close to record the result.
Choosing the right runner
The web-based Test Runner works for most UAT scenarios: it runs in the browser alongside the application under test, captures screenshots on demand, and logs mouse and keyboard events. The desktop Test Runner (Windows only) adds screen recording and richer diagnostic capture, which is useful when the application under test is a desktop app or when you need video evidence for a complex bug.
For stakeholder sessions, keep runs to 60–90 minutes maximum. Longer sessions produce fatigue and lower-quality bug reports.
Pro Tip: Pre-load expected result screenshots as attachments on each test case before the session. Testers who can compare “what I see” against “what it should look like” file more precise bugs and fewer false positives.
How do you capture diagnostics and file bugs during UAT?
The diagnostic data captured during a UAT run is what separates a useful bug report from a vague complaint. Test Runner and the Test & Feedback extension capture screenshots, action logs, screen recordings, system information, and automatic repro steps — all attached to the bug work item without manual effort.
What gets captured automatically
- Screenshots on demand or at the moment of failure
- Action log: mouse clicks, keyboard input, and navigation path
- Screen recording (desktop runner or Test & Feedback extension)
- System info: browser version, OS, screen resolution
- Repro steps: auto-generated from the action log
Filing a bug from a failed step
When you mark a step as failed and click Create bug, Azure DevOps pre-fills:
- Title from the test step description
- Repro steps from the action log
- System info from the environment
- Linked test result and build association
Add Severity and Priority before saving. A bug filed without severity is almost impossible to triage efficiently. Bugs in Azure Boards can be tracked as requirements or tasks, and linking them to builds and commits gives developers the context to reproduce the issue without a back-and-forth conversation.
Triage flow during UAT
Run a short daily triage (15–20 minutes) during the UAT window:
- Filter the bug backlog by the UAT area tag and the current build
- Deduplicate: group bugs that describe the same failure before assigning them
- Set priority and assign to the developer responsible for the affected feature
- Link each bug to its parent requirement work item
Azure Boards has no built-in automated duplicate detection. When multiple stakeholders report the same issue independently, you end up with three or four near-identical tickets. Manual deduplication during triage is the standard workaround, but it adds overhead. Wezardapp’s AI duplicate detection catches these before they reach the backlog.
Pro Tip: Define a minimum required field set for UAT bugs: Title, Repro Steps, Severity, and Affected Build. Reject any bug missing these fields at triage. Low-context tickets waste developer time and inflate your open-bug count.
How do you track UAT progress with dashboards and charts?
Knowing whether UAT is on track requires more than a gut check. Concrete metrics tied to your test plan tell you when to sign off and when to hold.
UAT metrics worth monitoring
| Metric | Definition | Why It Matters |
|---|---|---|
| % test cases executed | Executed / total assigned | Shows session completion rate |
| Pass rate | Passed / executed | Indicates product readiness |
| Open critical bugs | Active bugs with Severity 1–2 | Blocks release decision |
| Avg. time to triage | Hours from bug filed to assigned | Signals triage health |
| Test coverage vs. acceptance criteria | Test cases linked to requirements / total requirements | Confirms scope completeness |
Building a UAT dashboard in Azure DevOps
Add these widgets to a shared dashboard:
- Chart for test plans: “Active UAT tests by status” (Passed / Failed / Not Run) — one glance tells you where the session stands
- Query-based chart: “New UAT bugs by severity” filtered to the current build and UAT area tag
- Trend chart: “Test execution over time” to spot days when testers went quiet
- Bug count widget: filtered to Priority 1 and Priority 2, so stakeholders see the release-blocking number immediately
To associate results with a specific build, use Run with options when starting the test run. Every result recorded in that run is linked to the selected build, so your dashboard filters by build number to show acceptance status for a specific release candidate.
A useful query for UAT failures: filter work items where Work Item Type = Test Case, Outcome = Failed, Area Path = [UAT area], and Iteration = [current sprint]. Save it as a shared query and pin the chart to the dashboard.
How do you link UAT tests to requirements and builds for auditability?
Traceability is the audit trail that proves each customer requirement was validated in UAT and that the accepted build is the one that shipped.
Linking conventions to follow
- Create test suites as requirement-based suites linked to user stories or product backlog items. Every test case in that suite inherits the requirement link automatically.
- When running tests, always use Run with options to select the specific build. This associates every test result with that build in the Azure DevOps data model.
- When filing a bug from a failed test step, the bug is automatically linked to the test result and the selected build. No manual linking needed.
- After UAT completes, record the sign-off in a test run comment or a dedicated work item: list the build number, the approver’s name, the date, and the pass/fail summary. This becomes the audit record.
A query that surfaces gaps: filter for Work Item Type = User Story, State = Active or Resolved, Area Path = [UAT area], and then check which stories have no linked passing test results. Any story that appears in that query is an untested requirement.
Pro Tip: Copy test cases from your QA plan into the UAT plan rather than sharing them. Shared test cases mean a QA run can overwrite UAT results. A separate UAT plan preserves a clean baseline for customer sign-off.
UAT best-practices checklist for Azure DevOps
A checklist you can run through at the start of every UAT cycle:
- Scope defined: UAT covers only features in the current release, not regression of older functionality
- Acceptance criteria documented: every test case maps to a written criterion; no criterion means no test case
- Environment ready: UAT environment deployed, build number confirmed, test data loaded and sanitized
- Test plan and suites created: separate from QA plans, named with release identifier
- Testers invited: individual users added to the project, licenses confirmed, orientation done
- Diagnostics enabled: Test Runner or Test & Feedback extension active for all sessions
- Bug triage process agreed: daily triage time, severity definitions, deduplication step
- Dashboard live: metrics widgets added, shared with stakeholders before sessions start
- Sign-off criteria written: minimum pass rate, zero open Severity 1 bugs, named approver list
Common pitfalls
- Reusing QA test plans for UAT: QA runs pollute UAT results and make the sign-off record ambiguous
- Licensing friction for external testers: business users without “Basic + Test Plans” can’t execute tests; plan for this before the session, not during it
- Duplicate bug noise: multiple stakeholders reporting the same issue creates triage overhead and inflates open-bug counts
- Unclear sign-off rules: “UAT passed” means nothing without a written threshold; define it before the cycle starts
Sign-off template
Record the following before closing UAT:
- Build number accepted: ___
- Total test cases: ___ / Passed: ___ / Failed: ___
- Open Severity 1 bugs: 0 (required) / Open Severity 2 bugs: ___ (disposition noted)
- Final approver: ___ / Date: ___
Pro Tip: Read the acceptance testing entry criteria guide before finalizing your sign-off thresholds. Entry and exit criteria that aren’t written down before UAT starts are negotiated under pressure at the end — and that’s where quality slips.
What do you do when stakeholders won’t use Azure DevOps?
Azure Test Plans gives you traceability and diagnostics, but it asks something real of business testers: a license, a login, and enough familiarity with the UI to navigate test cases. For internal QA teams, that’s fine. For external customers, remote product demos, or distributed stakeholder reviews, it’s often too much.
Native Azure DevOps vs. low-friction capture
| Dimension | Native Azure Test Plans | Low-friction capture (e.g., Wezardapp) |
|---|---|---|
| Tester login required | Yes (project member + license) | No (browser extension or link) |
| Diagnostic capture | Manual (screenshot, action log) | Automatic (screen recording + AI transcription) |
| Duplicate detection | Manual triage | AI-powered before backlog creation |
| Azure DevOps integration | Native | Direct work item sync with attachments |
| Suitable for external users | Limited | Yes |
How the Wezardapp integration flow works
A stakeholder opens the Wezardapp browser extension during a UAT session. When they spot an issue, they click record: Wezardapp captures the screen, transcribes the issue description in real time, and runs AI duplicate detection against existing backlog items. If no duplicate exists, it creates a work item in Azure DevOps with the recording, transcript, and repro context already attached. The QA team receives a fully formed ticket rather than a Slack message saying “the button doesn’t work.”
This flow is particularly useful for:
- Customer UAT sessions where the client has no Azure DevOps account
- Remote product demos where the product manager is capturing feedback live
- Distributed stakeholder reviews where testers are in different time zones and async reporting is the only option
The Test & Feedback extension is Microsoft’s own low-friction option: it lets testers capture screenshots, record video, and create work items from a browser extension without navigating the full Test Plans UI. It’s a good middle ground for internal stakeholders who have a license but aren’t comfortable with Test Runner.
For teams that need UAT software that works across both technical and non-technical participants, combining Azure Test Plans for structured runs with Wezardapp for stakeholder capture covers both ends of the adoption spectrum.
Three steps to run your first UAT cycle this week
You don’t need a perfect setup to start. A minimal first cycle teaches you more than six months of planning.
- Prepare permissions and environment. Add testers to the project, confirm licenses, deploy the UAT build, and record the build number. Check that Test Runner opens without errors for at least one tester before the session.
- Create the test plan and assign testers. Build a requirement-based suite for the top 10–15 acceptance criteria in the release. Assign two or three business testers. Send the invitation template from the earlier section with a calendar invite.
- Run the session and triage bugs. Hold a 60–90 minute guided session. Triage bugs the same afternoon: deduplicate, set severity, link to requirements. Review the dashboard with stakeholders the next morning.
After the pilot, check three things: pass rate, open critical bugs, and whether testers could navigate the session without help. Iterate on test case clarity and session length before scaling to the full tester group.
Sign-off checklist after the run:
- All assigned test cases executed
- Pass rate meets the agreed threshold
- Zero open Severity 1 bugs (or each has a documented disposition)
- Named stakeholder has reviewed results and confirmed acceptance in writing
Why most UAT problems are process problems, not tool problems
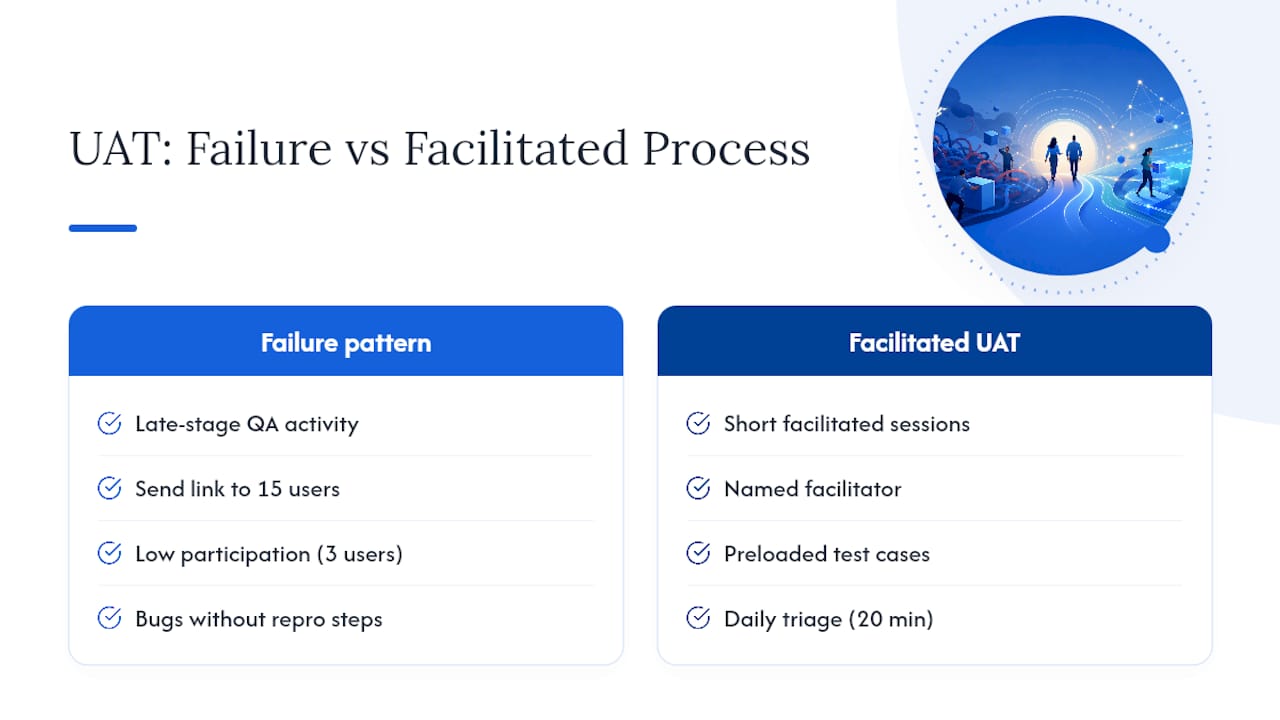
Teams that struggle with Azure DevOps UAT almost always have the same root cause: they treat UAT as a late-stage QA activity rather than a structured handoff to the business. The tooling is fine. The process is where things fall apart.
The most common failure pattern: a QA lead sets up a test plan, sends a link to 15 business users, and waits. Three users log in. Two file bugs with no repro steps. The rest send emails. The QA lead spends the next week manually transcribing feedback into work items, deduplicating reports, and chasing approvals. The release slips.
What actually works is treating UAT like a facilitated event. Short sessions with a named facilitator, pre-loaded test cases with expected results, a daily triage that takes 20 minutes, and a written sign-off threshold agreed before the cycle starts. Azure DevOps gives you the infrastructure for all of this. The gap is almost always in the facilitation, not the features.
The other underrated lever: reducing the friction for non-technical testers. Every extra click between “I found a bug” and “the bug is in the backlog” costs you a report. Wezardapp’s screen recording and AI transcription cut that path to one click, and the duplicate detection means the QA team isn’t triaging the same issue four times.
Wezardapp reduces UAT adoption friction and maps feedback into Azure DevOps
Running UAT in Azure DevOps works well for licensed internal teams. The gap appears the moment you invite a customer, a product owner from another department, or a remote stakeholder who has never opened Azure DevOps. That’s where feedback gets lost in email threads and Slack messages instead of the backlog.
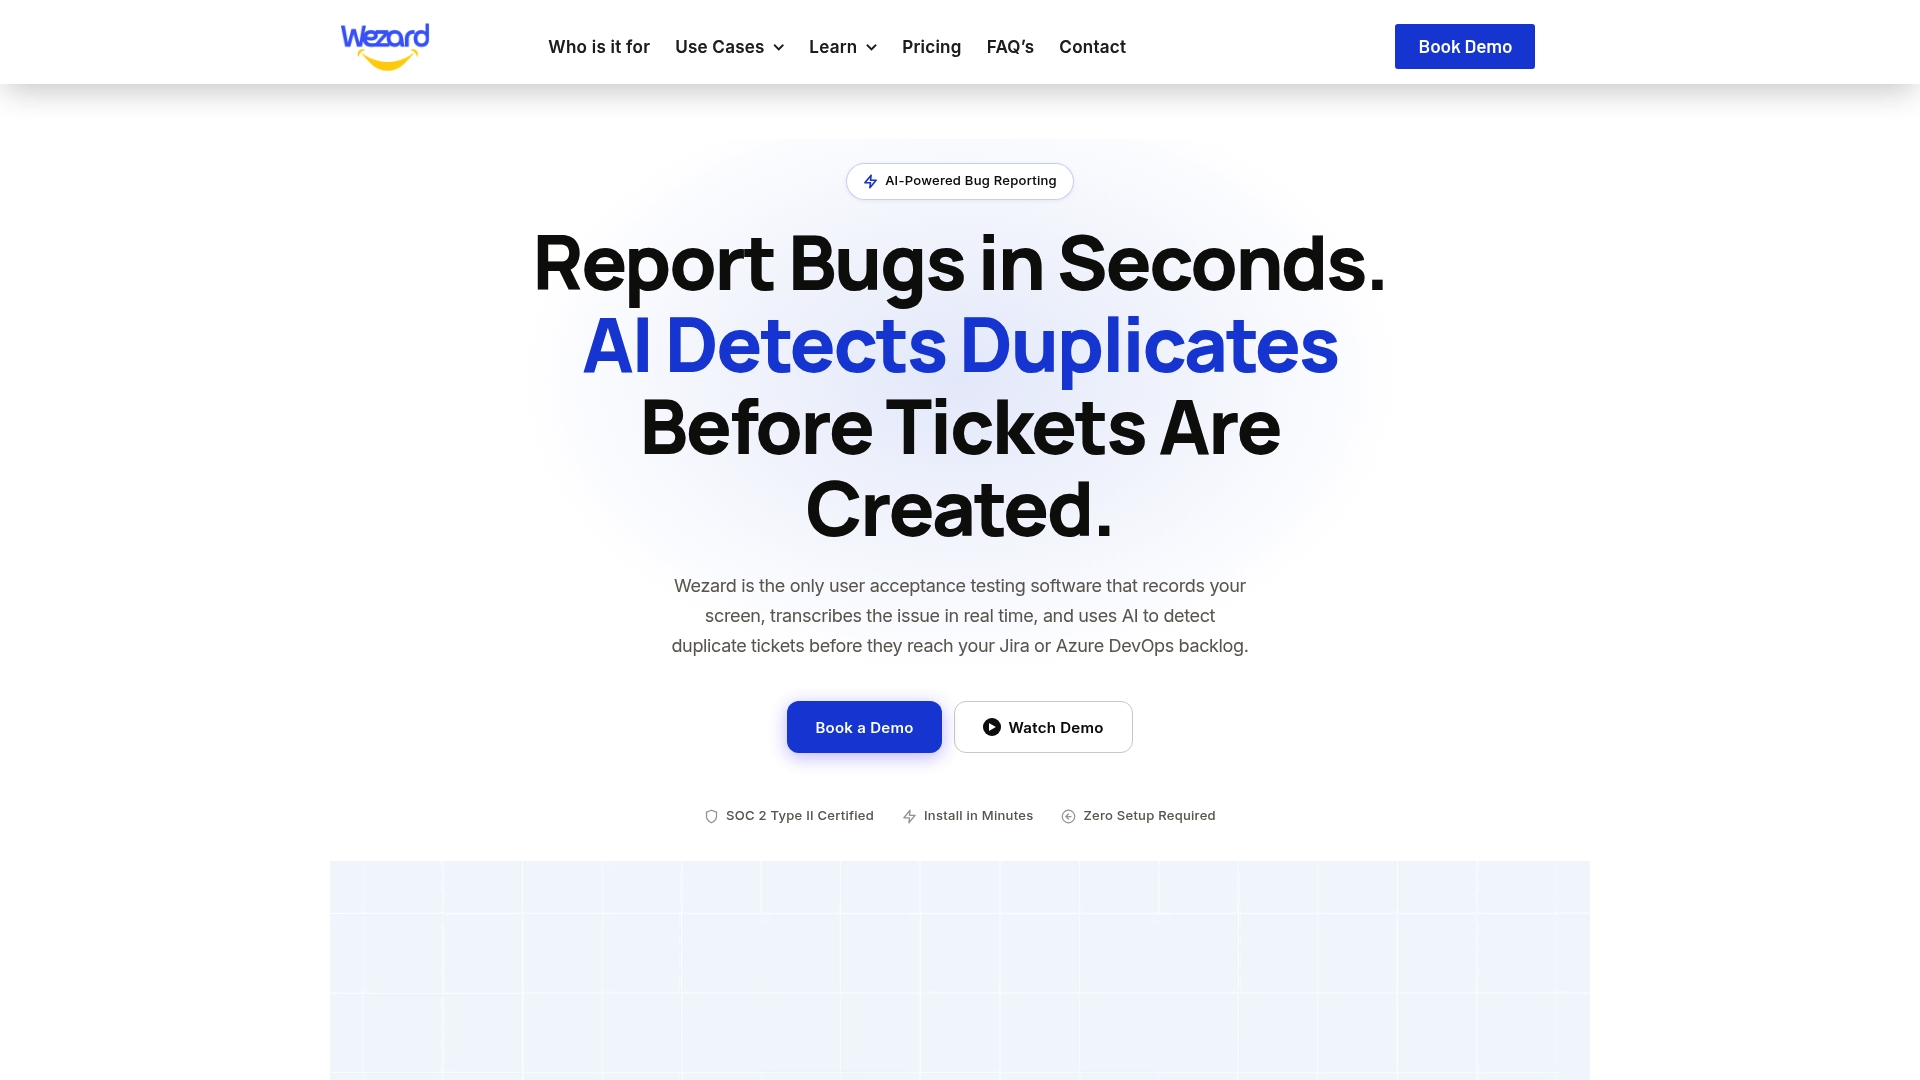
Wezardapp closes that gap without replacing your Azure DevOps workflow. A stakeholder clicks record in the browser extension, describes the issue out loud or in writing, and Wezardapp handles the rest: screen recording, real-time AI transcription, duplicate detection against your existing backlog, and a fully formed work item pushed directly into Azure DevOps with attachments and repro context included.
Key capabilities:
- Screen recording + AI transcription: captures what happened and what the tester said, automatically
- AI duplicate detection: checks for existing tickets before creating a new one, so your backlog stays clean
- Guided ticket submission: walks non-technical testers through the report without requiring Azure DevOps training
- Direct Azure DevOps sync: work items appear in your project with recordings, screenshots, and repro steps attached
The result is faster stakeholder reporting, fewer duplicate backlog items, and richer reproduction artifacts for developers. Start a trial or explore the Azure DevOps integration to see how the sync works with your existing project setup.
Sources
Official Microsoft documentation and hands-on labs to validate every procedural step in this guide:
- What is Azure Test Plans? Manual, exploratory, and more – Azure DevOps
- Run Manual Tests with Azure Test Plans
- Azure Test Plans Tutorial: Architecture, Pricing, Use Cases, and Hands-On Guide for DevOps
- Exercise 1: Managing Test Plans, Suites and Cases